


Instalasi ISA Server 2000 di windows 2003





Untuk dapat
menginstalasi ISA Server 2000 pada windows 2003 direkomendasikan untuk
menyiapkan hal berikut ini ;
· Installer ISA Server 2000
· Installer ISA Server Service Pack 1
· Installer isahf255.exe (Hot Fix)
· Installer Feature Pack 1
Install ISA
Server 2000
Now for the fun
part. Get out your ISA Server 2000 CD-ROM disk and put it into the drive, or
connect to a network share that contains the ISA Sever installation files. Then
perform the following steps to begin installing ISA Server on a Windows Server
2003 machine:
- Double click on the ISAAutorun.exe file on the ISA Server CD
- Click on the Install ISA Server link on the Internet Security & Acceleration Server 2000 splash page.
- You will see an ISA 2000 dialog box that informs you that you need to install ISA 2000 Service Pack 1 in order for things to work right. We know that, so we’ll click Continue

- Click Continue on the Welcome to the Microsoft ISA Server installation program page.
- Enter your CD Key in the CD Key dialog box. Click OK.
- Write down your Product ID as list in the Product ID dialog box. Click OK in the Product ID dialog box after writing this number down.
- Click I Agree in the Microsoft ISA Server Setup dialog box.
- Click the Full Installation button in the installation type dialog box. I am assuming you want to use all the features that ISA Server has to offer. You can use the Add/Remove Programs applet later if you want to remove some ISA Server features.
- In this example we are installing ISA Server in standalone mode, not in enterprise array mode. Click Yes in the dialog box that asks if you want to continue.

- Select the Integrated mode option on the Select the mode for this server page. You want to take advantage of the full power of your ISA Server firewall. Integrated mode gives you everything the Web Proxy and Firewall services have to offer. Go for it! Click Continue.

11.
On the Web cache page, select a drive to
put the Web cache file on. The drive must be NTFS. Type in a size of the cache
in the Cache size (MB) text box and then click the Set button.
Then click OK.

12. On the LAT page, click the Construct
Table button. On the Local Address Table page, remove the checkmark
in the Add the following private ranges checkbox. Put a checkmark in the
Add address ranges based on the Windows 2000 Routing Table checkbox.
Remove the checkmark from the checkbox representing the external interface, and
leave the checkmark in the checkbox for the internal interface. Click OK
in the Local Address Table dialog box, then click OK in the Setup
Message dialog box that informs you that the LAT was contstructed based on
the Windows 2000 routing table (in spite of the fact that you’re installing ISA
Server on a Windows Server 2003 machine).

13. Click OK on the LAT dialog
box after reviewing the list listing in the Internal IP ranges list.

14. Unlike Windows 2000, Windows Server
2003 does not install IIS by default (yeah! You should NEVER run IIS services
on a firewall – except for maybe the SMTP service). You will see a dialog box
telling you that you’ll have to install the SMTP service if you want to run the
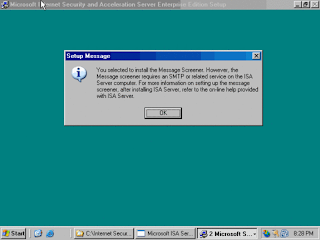
SMTP Message Screener. Click OK to continue

15. The ISA Server services are installed.
You will see a warning balloon informing you that ISA 2000 will cause Windows
to become unstable. Close the balloon, remove the checkmark from the Start
ISA Server Getting Started Wizard checkbox, and then click OK in the
Launch ISA Management Tools dialog box.

16. Click OK in the dialog box
that informs you that setup was completed.
17. Click OK in the dialog box
that informs you that setup has failed to start one or more services.
Now you’re ready
to install ISA Server Service Pack 1.
Install ISA
Server Service Pack 1
The next step is
to immediately install ISA Server Service Pack 1. You can get Service Pack 1 at
http://www.microsoft.com/isaserver/downloads/sp1.asp Download SP1 to
a machine on the internal network, scan it for viruses, then copy it to the ISA
Server. Perform the following steps after copying the service pack to the ISA
Server:
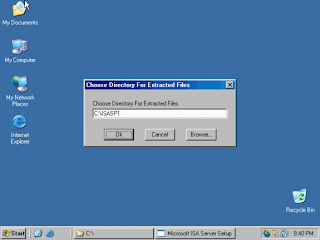
- Double click on the isasp1.exe file. Type in a path to put the temporary files in the Choose Directory for Extracted Files dialog box. Click OK.

- Click I Agree in the End User License Agreement (EULA) dialog box.
- Click OK in the Microsoft ISA Server 2000 Update Setup dialog box. The computer will restart
 That’s all there is to installing ISA Server service pack 1.Install HotFix isahf255.exeLog onto the machine after the ISA Server service pack 1 installation routine restarts the machine. There are a few hotfixes and updates you need to install on the Windows Server 2003/ISA Server machine to insure that everything works correctly. You can download the HotFix pack, isahf255.exe at http://www.microsoft.com/downloads/details.aspx?familyid=77d89f87-5205-4779-b1ab-fc338283b2d9&displaylang=enDownload the file to a machine on the internal network, scan it for viruses, and then copy it to the ISA Server. Perform the following steps after copying the file to the ISA Server:1. Double click on the isahf255.exe file. Type in a path for the temporary files in the Choose Directory for Extracted Files dialog box, then click OK.


2. Click I Agree in
the EULA dialog box
3. Click OK in the Microsoft
ISA Server 2000 Update Setup dialog box that informs you that the
update was successful applied.

Note that you do
not need to restart the server. The next step is to install Feature Pack 1.
Install Feature
Pack 1
Feature Pack 1
(FP1) is not required. You don’t have to install ISA Server Feature Pack 1 on
the Windows Server 2003/ISA Server machine to get it working correctly. However,
I do highly recommend that you install ISA Server Feature Pack 1 because it
adds a lot of cool new capabilities and Wizards. You can download ISA Server
Feature Pack 1 at http://www.microsoft.com/downloads/details.aspx?FamilyID=2f92b02c-ac49-44df-af6c-5be084b345f9&DisplayLang=en
Download the
feature pack to a machine on the internal network and scan it for viruses. Then
copy the file to the ISA Server and perform the following steps:
1. Double click on the isaftp1.exe
file. Type in a path for the extracted files in the Choose Directory
For Extracted Files dialog box.
2. Click I Agree in the Feature
Pack 1 EULA dialog box.
3. Click OK in the Microsoft
ISA Server 2000 Feature Pack 1 dialog box. Leave the checkmark in the Read
about ISA Server Feature Pack 1 checkbox to learn more about what you
get with Feature Pack 1.


